Porcelain Fused to Metal: Non-Shouldered Abutment
Page 1 | Page 2 | Page 3 | Page 4 | Page5 | Page 6 | Page 7 | Page 8
Temporary or Healing Abutments
 |
 |
 |
 |
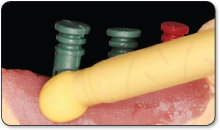
1. At the time of uncovering, place a titanium temporary abutment or a plastic healing abutment. These abutments will support the soft tissue and assist in the formation of the gingival sulcus. Either abutment may be modified to achieve a desired gingival contour. Temporary or transitional crowns should not be placed on temporary or healing abutments.
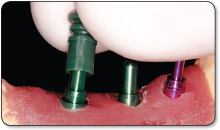
Note: Select a temporary or healing abutment that is of a sufficient size and shape to laterally support the interdental papillae, but will not encroach upon the papillae.
Implant Level Impression
 |
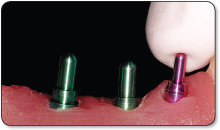 |
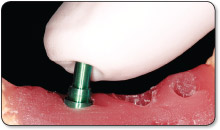
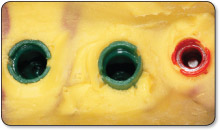
| 1. Insert a green 3.0mm titanium impression post into the implant well, using finger pressure. | 2. Insert a red 2.0mm titanium impression post into the implant well, using finger pressure. |
 |
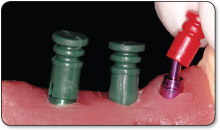 |
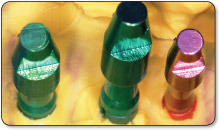
| 3. Snap a 3.0mm plastic impression sleeve onto a corresponding 3.0mm titanium impression post. | 4. Snap a 2.0mm plastic impression sleeve onto a corresponding 2.0mm titanium impression post. |
 |
 |
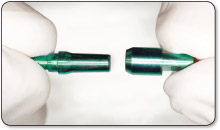
| 5. Inject impression material around plastic impression sleeves and make impression. | 6. After making impression, plastic impression sleeves should be withdrawn within the impression while titanium posts remain in the implant well. |
 |
 |
| 7. Remove titanium posts from the implant well and assemble to a corresponding titanium implant analog. | 8. Insert assembled unit into the impression. |
 |
|
| 9. Pour a stone model. |
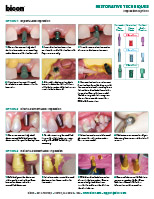
Impression Technique PDF
 |
Impression and Temporization Options |
Extra-Oral Cementation
 1. After the crown has been fabricated and checked for color and morphology, extra-orally cement the abutment and crown. Tap the abutment-crown unit into the well of the implant.
Page 1 | Page 2 | Page 3 | Page 4 | Page 5 | Page 6 | Page 7 | Page 8